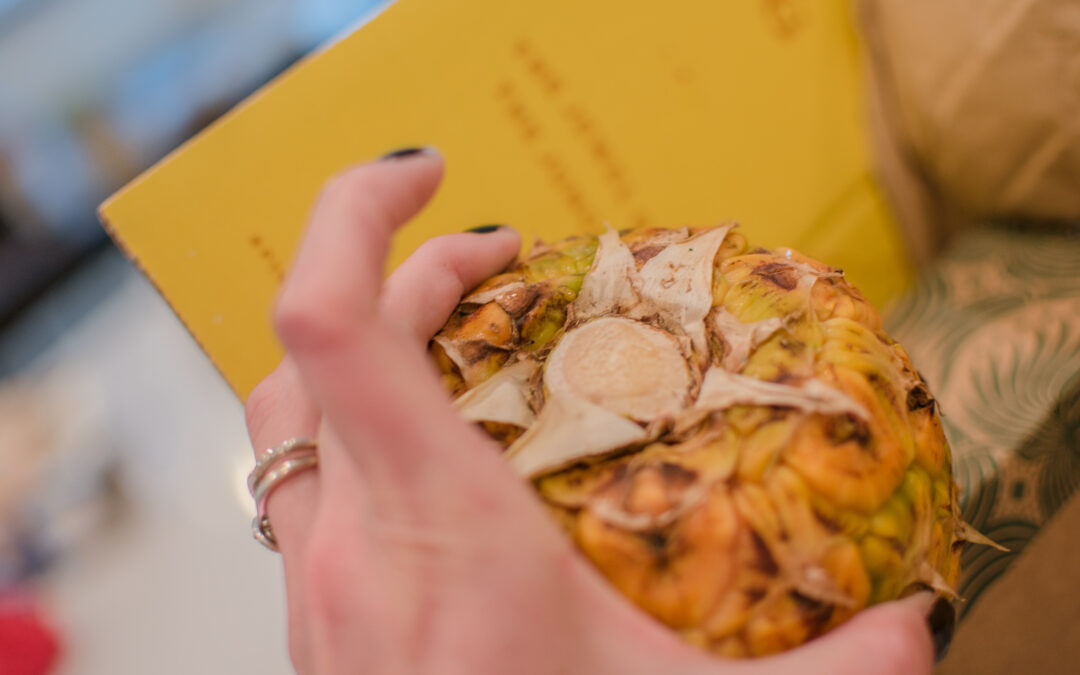
Pink Pineapples Are Now A Thing! Here Is Everything You Need To Know & Where To Buy Them
I couldn’t believe my eyes when I came across this website, Pink Pineapples are officially a thing! Of course, I adore all things pink and had to order one for myself. Here is everything you need to know about these cute new fruits.
What Do Pink Pineapples Taste Like?
Pink pineapples taste somewhat similar to the original yellow variety, but they have a striking difference. A certainly improved flavor, the new one is sweeter and less tarte. While keeping that same crisp bite we are all used to, the texture is subtly softer.
Verdict – Deliciously Improved.
Where To Buy A Pink Pineapple
Pink Pineapples are available online only at pinkglowpineapple.com for US customers. However, the price is STEEP. One pineapple will cost you $49 with free shipping to the East Coast. West Coast customers will pay $40.37 or more, depending on the shipping options. They arrive in just a few days, much quicker than other foods that I have ordered online. NOTE they do not ship with ice & you will want to refrigerate them immediately. Boxes are limited every day, be sure to order yours quickly before they sell out.
Last Details
As you can see above, they also look visibly different from the older variety. Instead of the original lined patterns inside, these pink pineapples look more like a watermelon in texture. They’re adorable and would make for the perfect conversation starting party snack. I also love the presentation, each pineapple comes with a certificate of authenticity as seen below. So while it is pricey, at least you’ll still have bragging rights that you spent a ton for a pink pineapple.
10/10 recommend. Delicious, adorable, and fun to receive. I will order again.
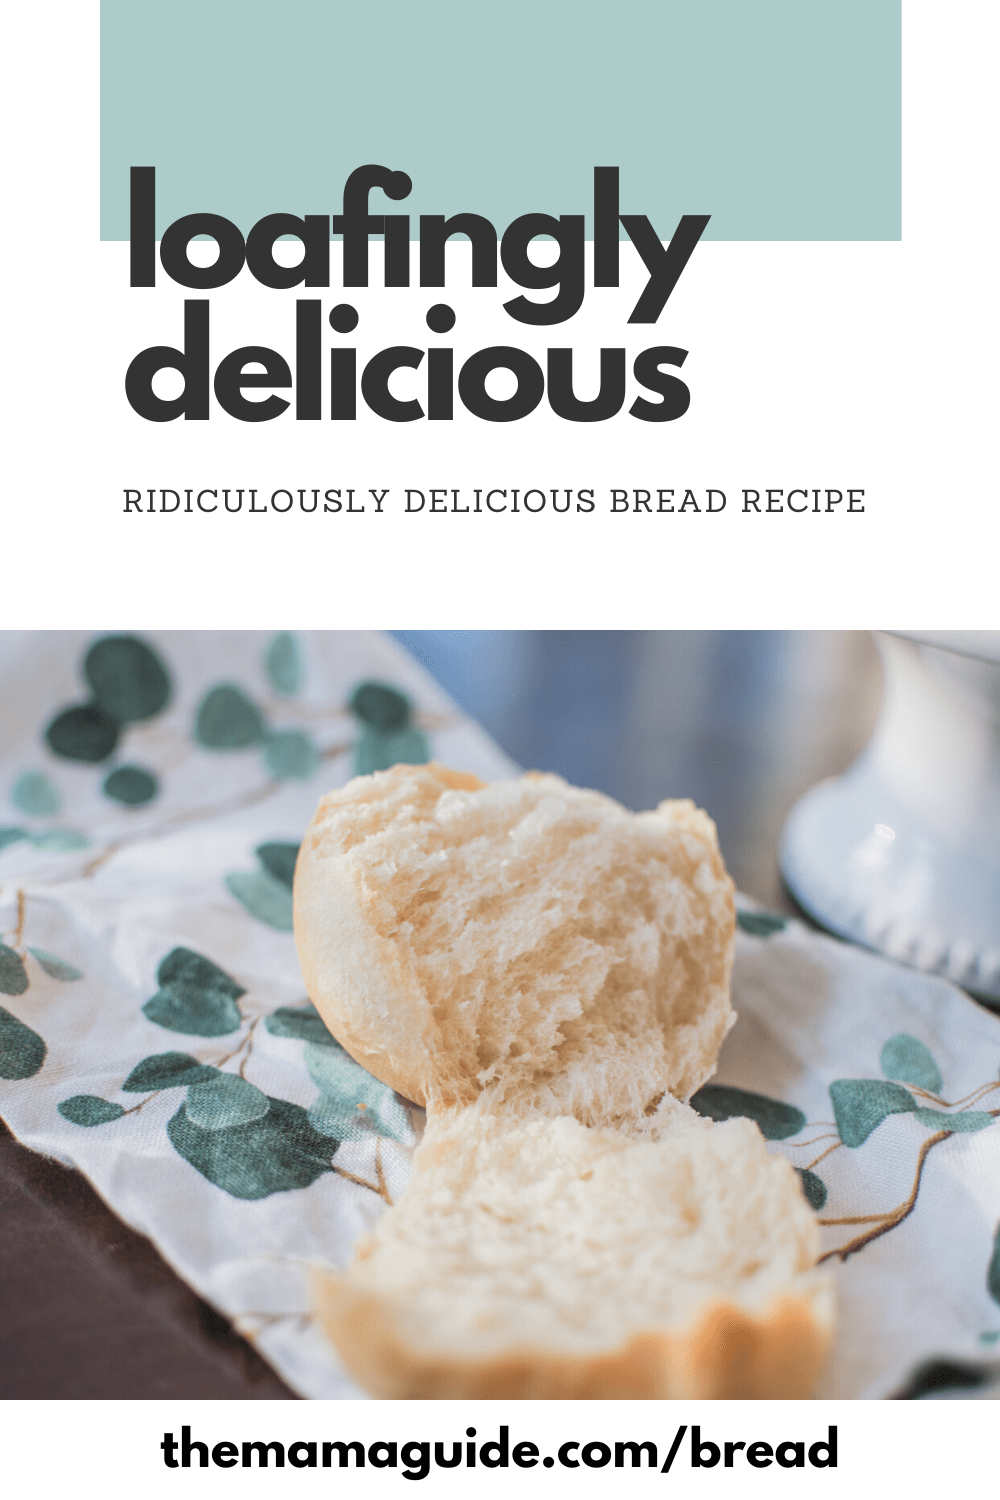
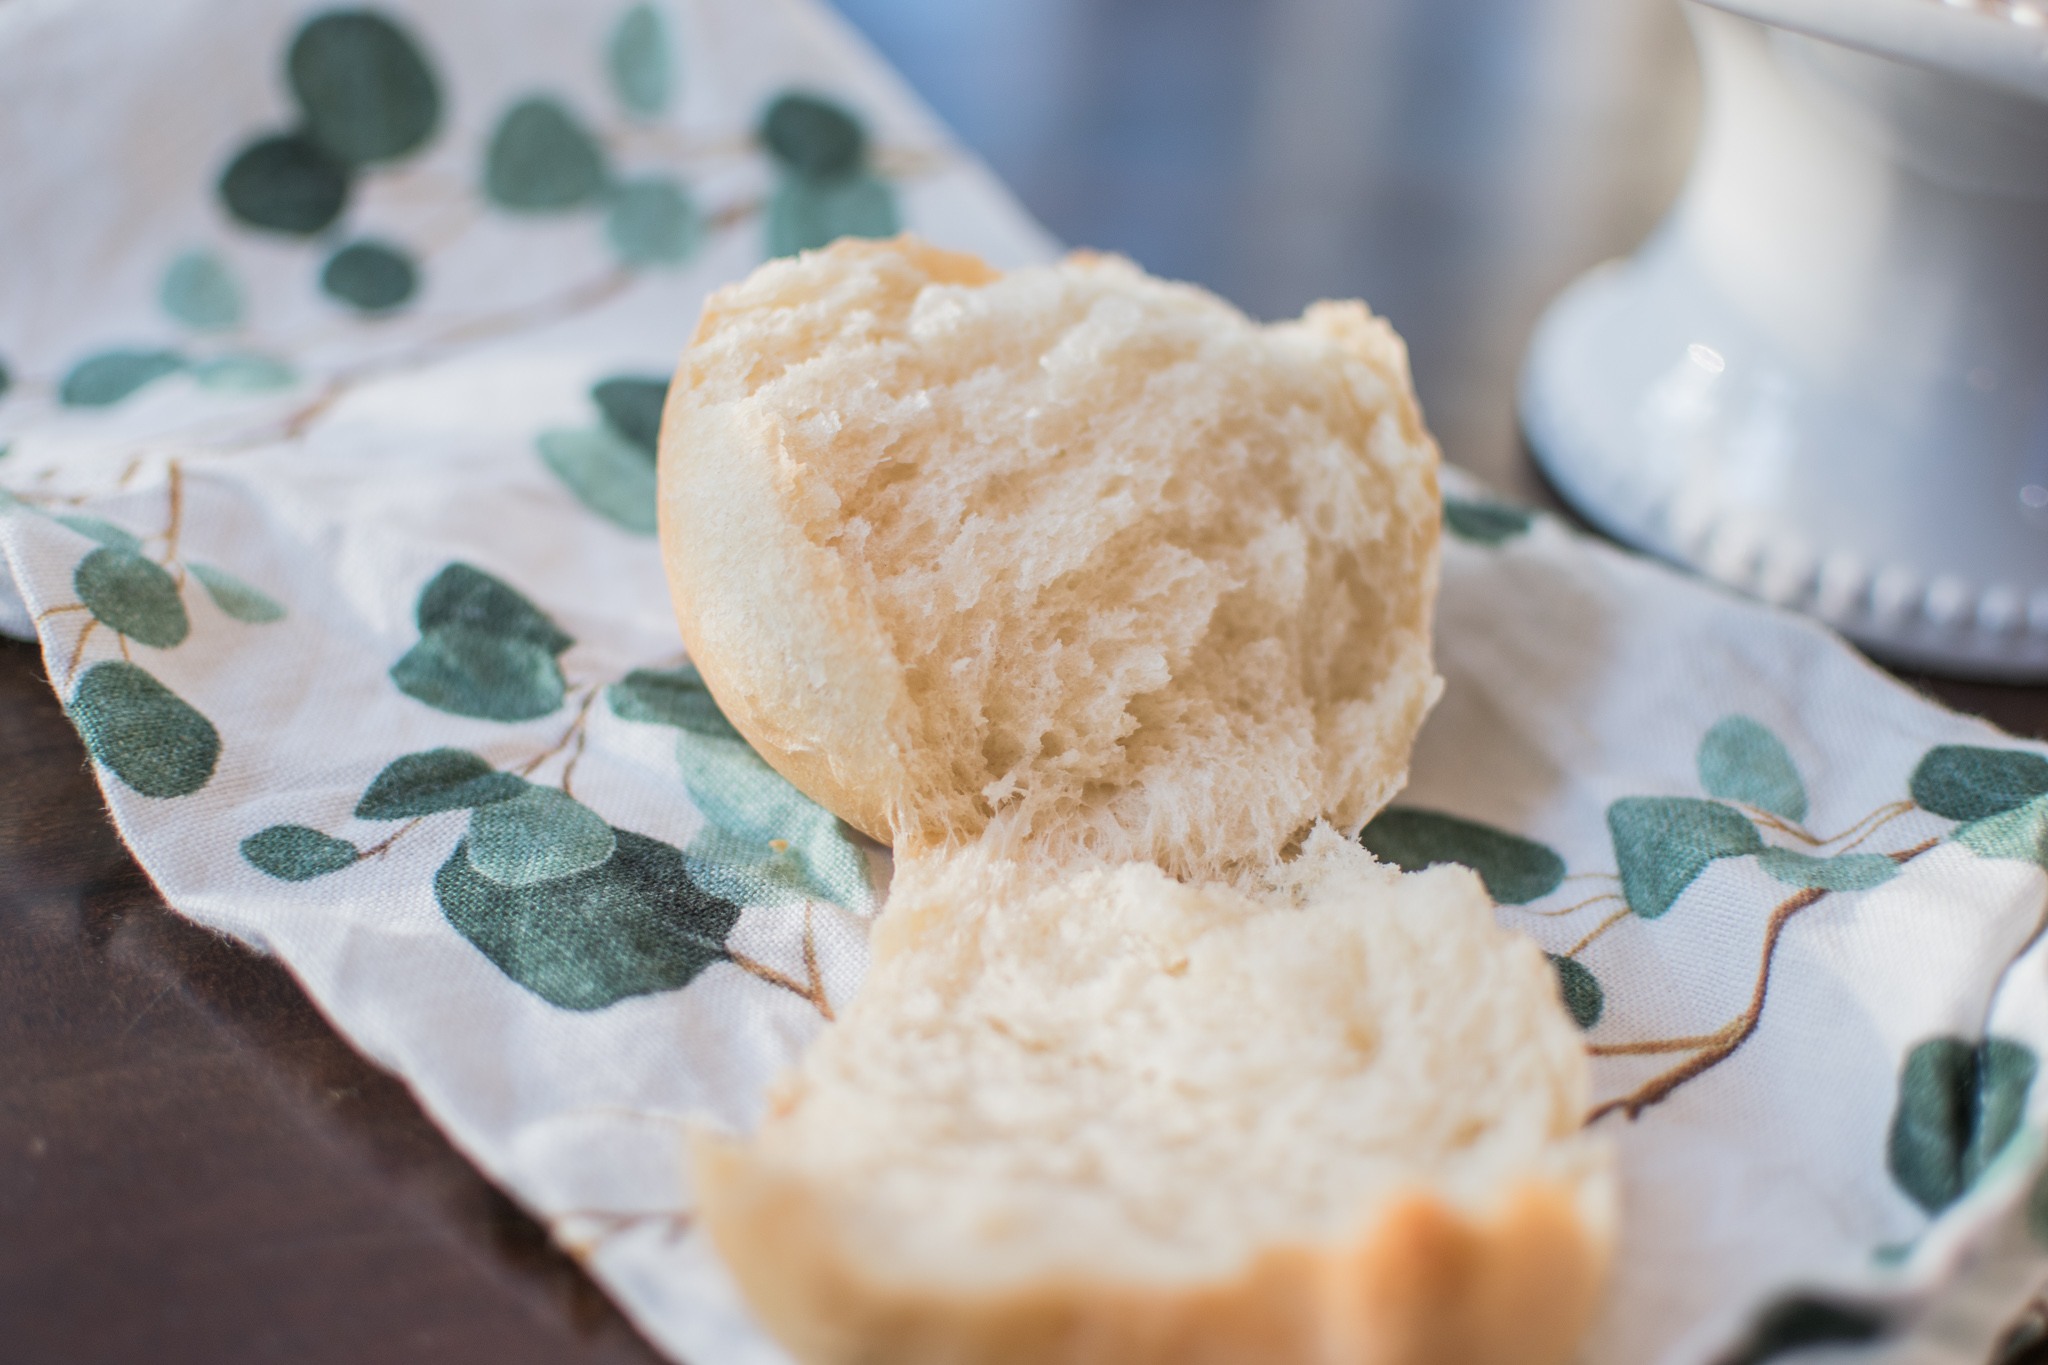
If you’re reading this right now, we’re in the middle of Coronavirus lockdowns and many stores are out of bread. If you’re like me, you probably need more! So here it is, I’m sharing my super-secret white bread recipe. Before you make it, I have to warn you. You should probably make a couple batches because this bread is so good that no one can stop eating it- lol. Seriously though, you’ve been warned, it’s really hard to put down.
And even though we’re in the middle of boredom-central, I’ll spare you the long boring story of how the recipe was created, because IDK why those even belong on a recipe. Seriously, we just want to know how to make the dang thing. Lol.
Note: This recipe works fantastic for both standard baking and bread machines.
Printable Recipe
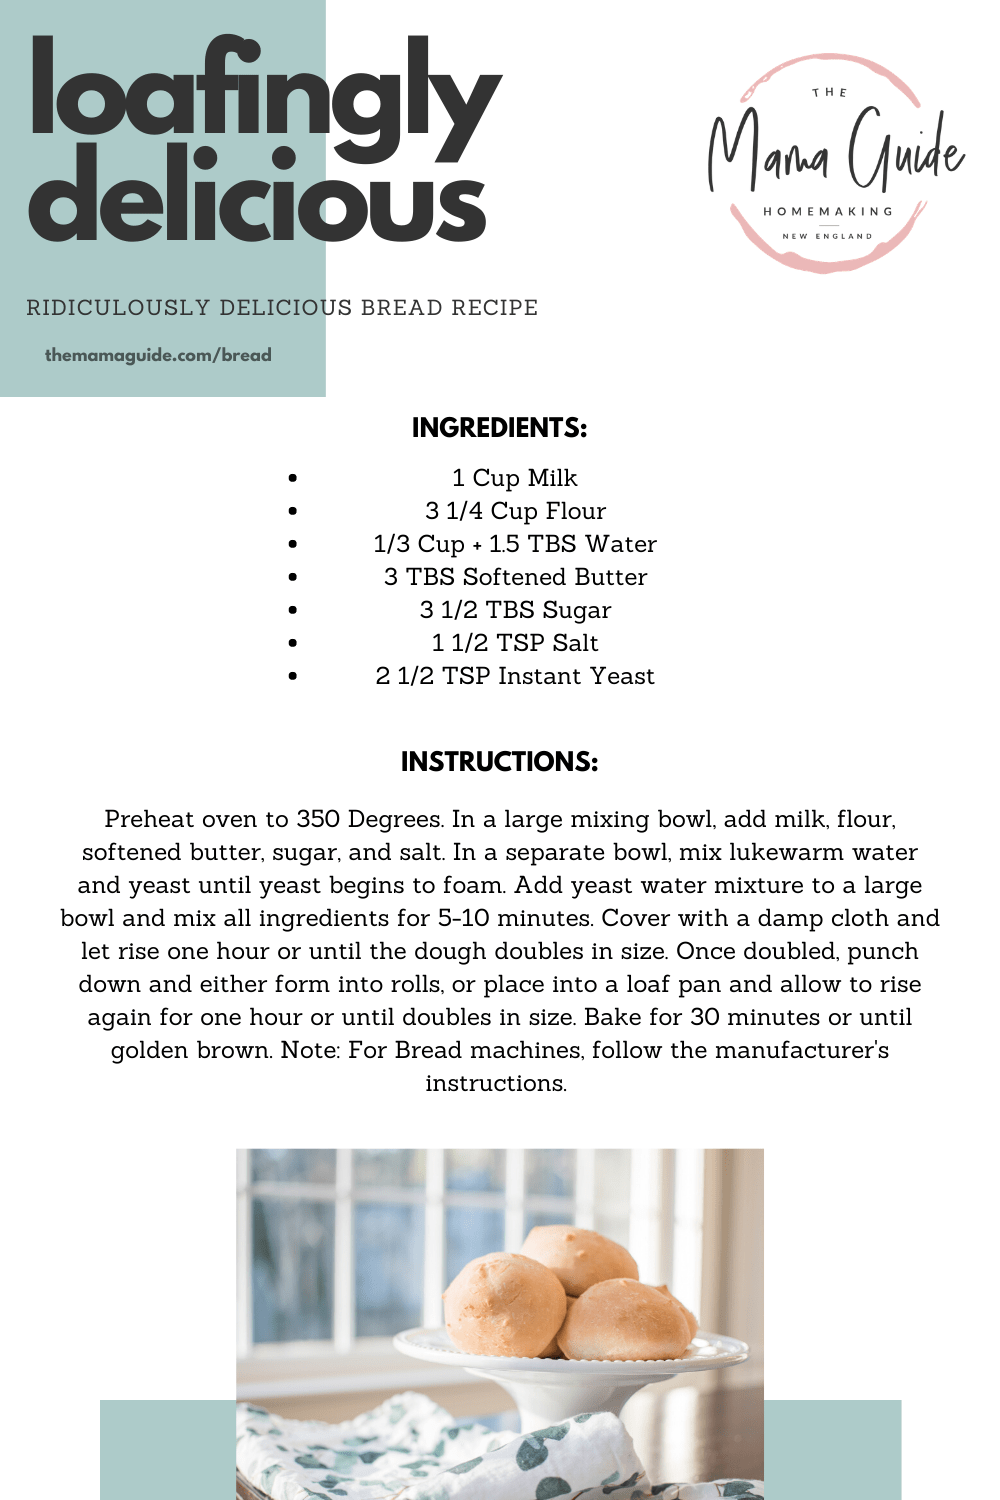
Ingredients
1 Cup Milk
3 1/4 Cup Flour
1/3 Cup + 1.5 TBS Water
3 TBS Softened Butter
3 1/2 TBS Sugar
1 1/2 TSP Salt
2 1/2 TSP Instant Yeast
Instructions
Preheat oven to 350 Degrees. In a large mixing bowl, add milk, flour, softened butter, sugar, and salt. In a separate bowl, mix lukewarm water and yeast until yeast begins to foam. Add yeast water mixture to remaining ingredients and knead for 5-10 minutes. Cover with a damp cloth and let rise one hour or until the dough doubles in size. Once doubled, punch down and either form into rolls, or place into a loaf pan and allow to rise again for one hour or until doubles in size. Bake for 30 minutes or until golden brown. Note: For Bread machines, follow the manufacturer’s instructions.
Additional Notes
This white bread recipe works great for both rolls and sandwich bread. This recipe works fantastically inside bread machines as well as standard oven baking. A mixer with a dough hook is recommended for kneading, and full knead time of ten minutes produces the best gluten structure. This bread recipe is very beginner friendly.
If you need any additional help- email me at chelsey@themamaguide.com
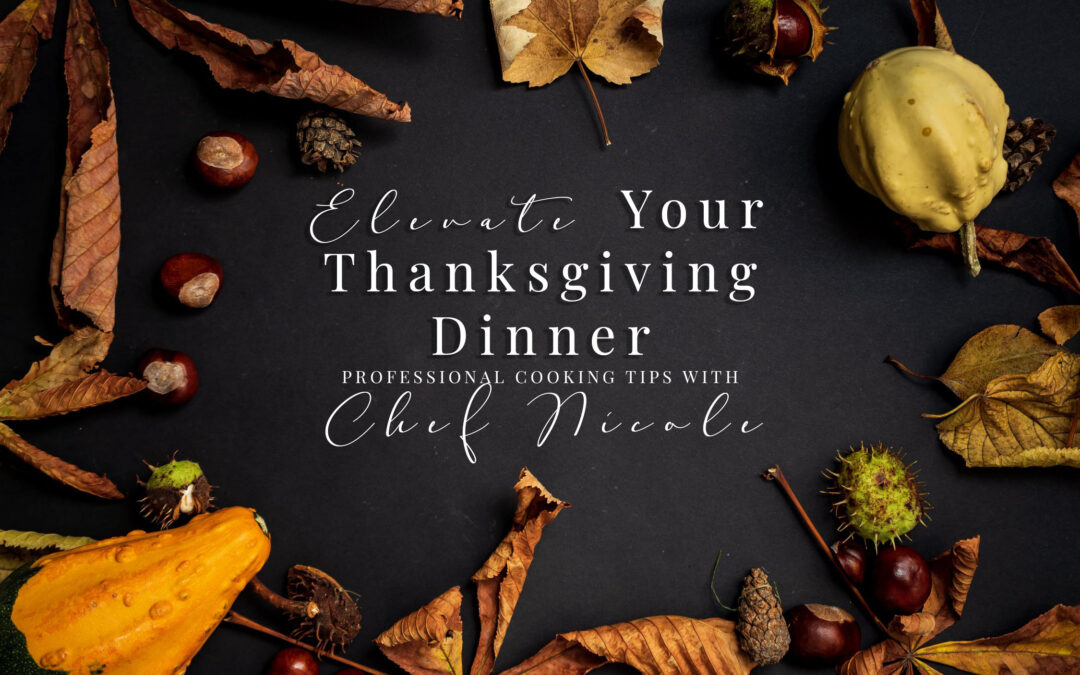
Elevate Your Thanksgiving Dinner With These Professional Tips From Chef Nicole Studer
Chef Nicole is a cooking genius bringing us her very best tips to elevate your Thanksgiving Dinner! Whether you’re cooking for a few, or a crowd, use these expert tips to bring your inner chef out this year and the many to come. Interviewing her was such a pleasure, if you have questions for her in the future, be sure to let us know and subscribe to see if your questions are featured for her in posts to come!
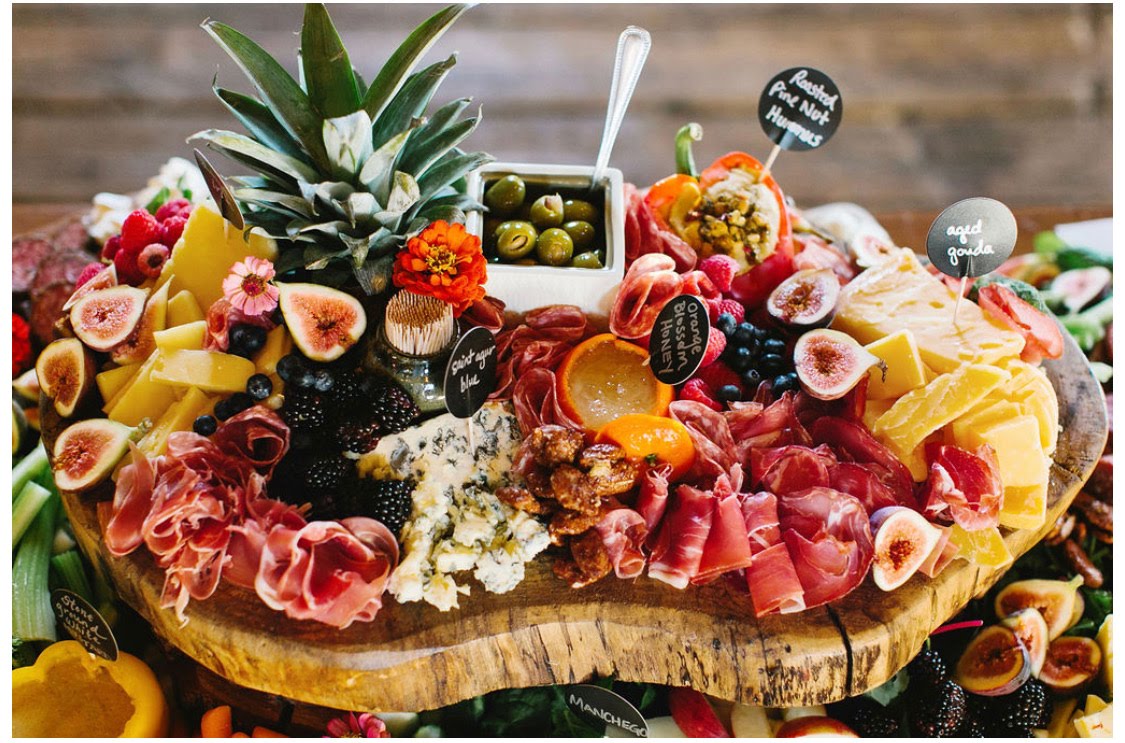
1. Charcuterie Boards Are A Must For Guests While You Cook
Chef Nicole: Charcuterie boards are a total crowd pleaser. You can be really creative or just throw a few things together, I like to start with basics and add off of that. I live in a nut free house so I like to put things like nuts on the side.
Q: What are your favorite items that you can’t live without? Favorite cheese that all our guests will love?
Chef Nicole: My go to is totally a Brie. I love how full of flavor it is, easy to eat and pairs well with all types of crackers and wine. When in doubt, serve familiar foods and crackers that everyone knows. I go with a ripened cheese like Brie, a hard cheese like Parmesan, a soft cheese like Mozzarella, Blue Cheese and a semi-hard one like Gouda. I also like to add a cheese with spice in it like a pepper jack. Always use grapes and apples then just fill in with something seasonal like pears, figs or dried cranberries.
2. Mashed Potatoes The RIGHT Way
Chef Nicole: I don’t mess around because I LOVE mashed potatoes and I am super critical of them lol. I recommend warming your milk, butter and or cream in a saute pan over heat before mixing them into your potatoes.That way, when you add them into your already piping hot mashers, you’re not changing the temp or having to reheat them. Another tip for mashers is that sometimes we have too much going on and slightly over cook them. You can still save them by adding in more milk and butter then placing them on a baking sheet lined with parchment. Give them a little cook in the oven to regain that fluffy texture again, instead of a wet mixture mess.
3. Use Compound Butter For Unbelievable Flavor
Chef Nicole: Compound butter this is where you let butter come to room temperature and throw it in your Kitchenaid or mixer with herbs and seasonings to enhance the flavor of your butter. I usually throw in herbs that go well with my meal, this is something that you can tailor to you and the flavors you like.
Q: What herbs do you use and what would you use compound butter for?
Chef Nicole: My go to is Rosemary, Sage, diced Shallots, salt and pepper. First I mix the butter then chop my herbs. I love fresh herbs; I believe that fresh is better but for something like this if all you have is dry herbs that is totally usable and no need to stress. Mixing is important for evenly distributing the flavors into your butter. Use your compound butter to rub onto your turkey, this is way better than randomly sprinkling herbs on top because you can get the flavors easily distributed and really into the meat. I also use this on the inside of my turkey!
Photo Credit Logan Lane @Sarahmae’s
4. Speed Up Cooking- Take Out The Turkey’s Spine
Chef Nicole: It’s called Spatchcock Turkey. This is where you remove the spine and lay your turkey flat while cooking, it helps you cook your turkey in half the time. It’s something we do in the cooking world a ton with chicken, but I did it last year on Thanksgiving and my results were amazing. I was able to make it much quicker and easier than stressing about the main course not being ready.
Q: How do you even cut the spine out of the turkey, is this hard?
Chef Nicole: I cut out the spine down the back and only remove the spine with a knife or kitchen scissors. You are sit the turkey on its butt and and start by cutting from the neck towards the end. You can then lay it flat on your baking sheet and cook it for about half the time, measuring the meat with a thermometer for food safety.
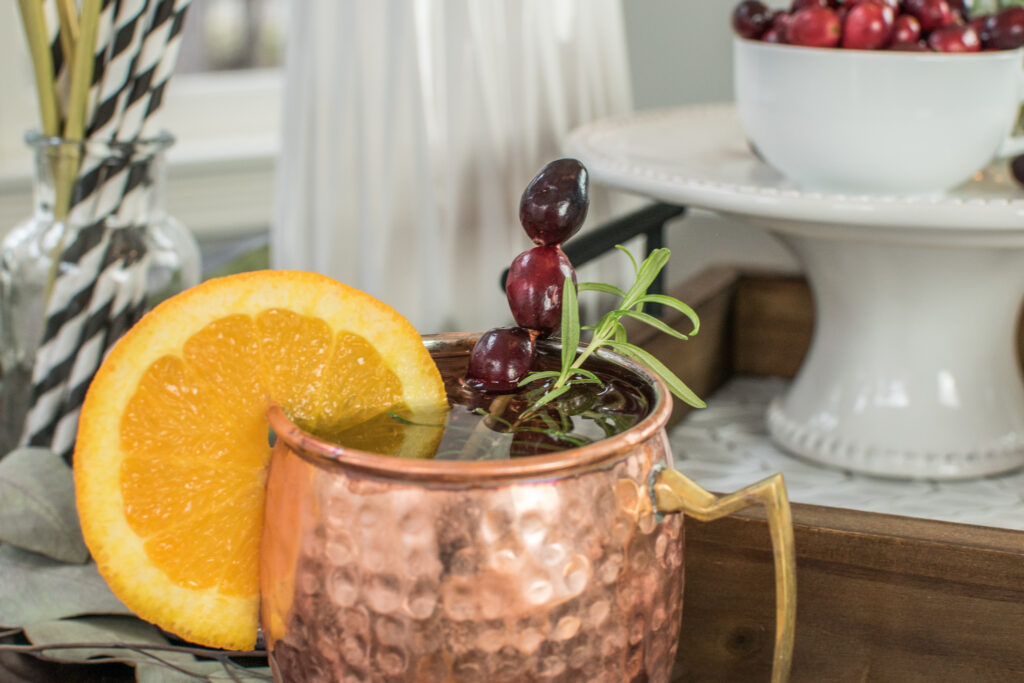
5. The Best Holiday Cocktail- Chef Nicole Approved
Chef Nicole: -Holiday Sangria. I love Sangria because it’s pretty much grab your favorite things, throw them into a pitcher with ice and fresh fruit and call it good! You are on your way to happy town lol. This is also nice because you know mamma needs her wine and mostly on the holidays! I just start with red, white or rose. Then you will need some booze, if you go with white or rose wine add a light liquor like vodka. If you go with red wine, traditionally you add Brandy. I also like to add some sparkling water, seltzer or tonic water; this adds a fun bubbly element. Simple syrup goes in to taste for sweetener and then all the fresh fruit you can think of. For holidays I like to add things that are in season like cranberries and citrus like oranges. They are both in season in the fall/winter, perfect for all the holidays!
6. The Best Thanksgiving Dessert To Serve?
Q: One Last question, what is the best and easiest dessert to serve as a chef on Thanksgiving?
Chef Nicole: Pumpkin Pie all the way! With more whipped cream than pie!
The Mama Guide approves that dessert!
Meet Chef Nicole:
Chef Nicole (left) lives In Portland OR with her beautiful wife Kellie and two pups, Ariel the Basset Hound and Oakley the Toy Aussie. Nicole is inspired in the kitchen by teaching. She likes to bring the love of cooking and flavor through her dishes. She enjoys helping people understand cooking on a whole new level and getting them excited to create meals that they love. Nicole wants to show people that cooking can be easy instead of intimidating. Most of all, she loves to show her strengths and heart though the meals she serves.
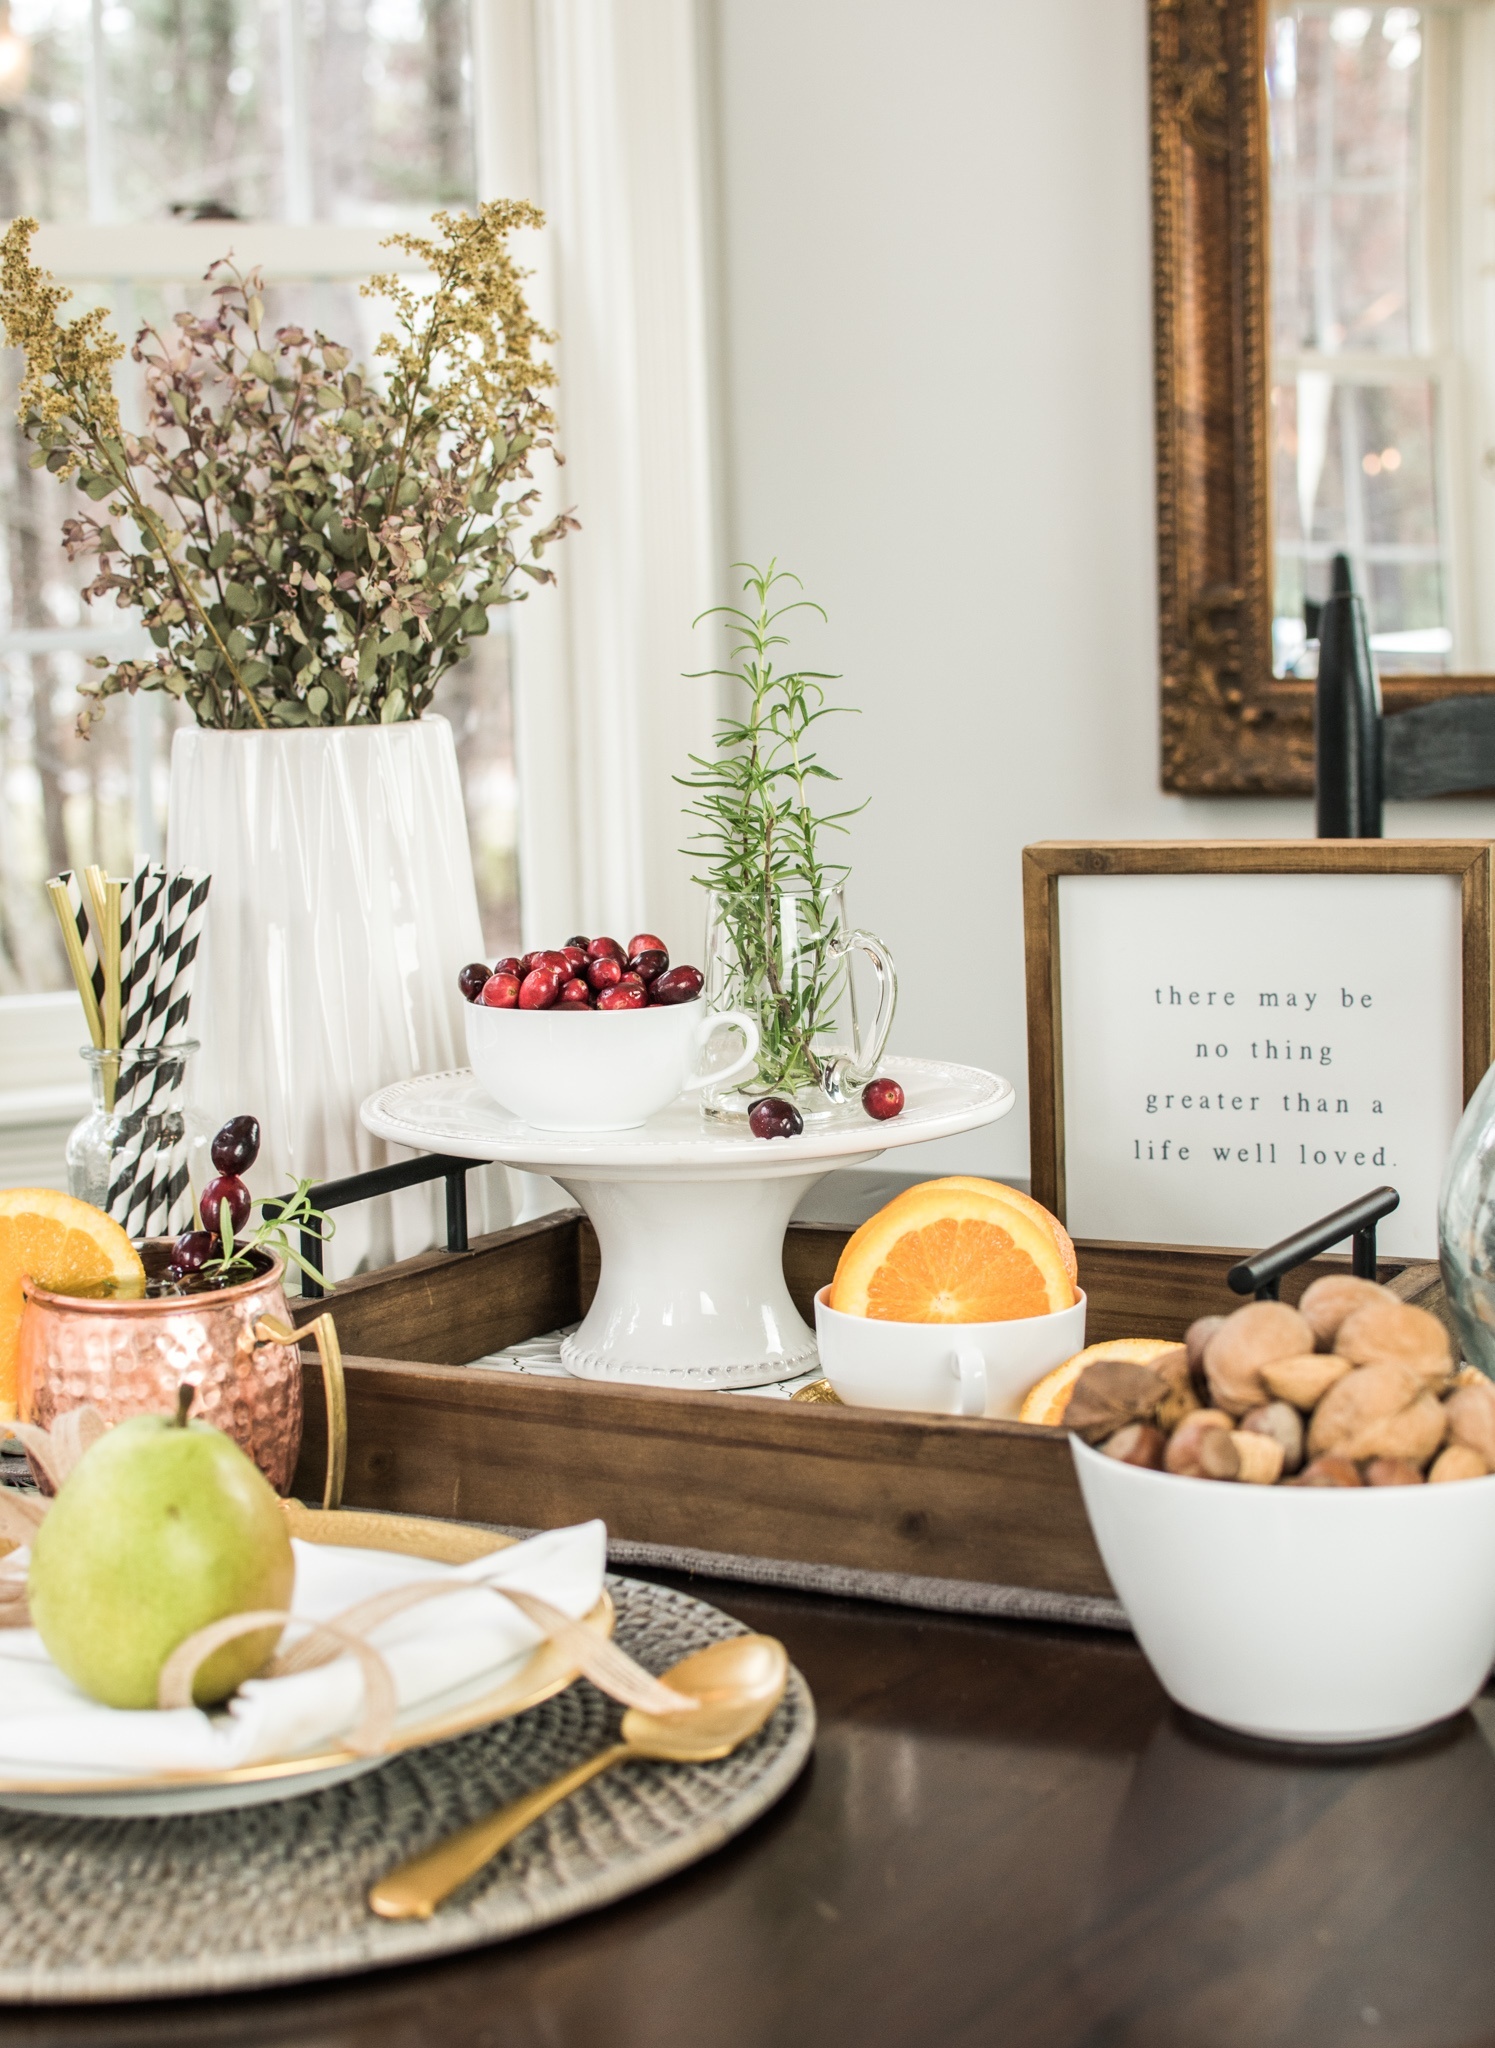
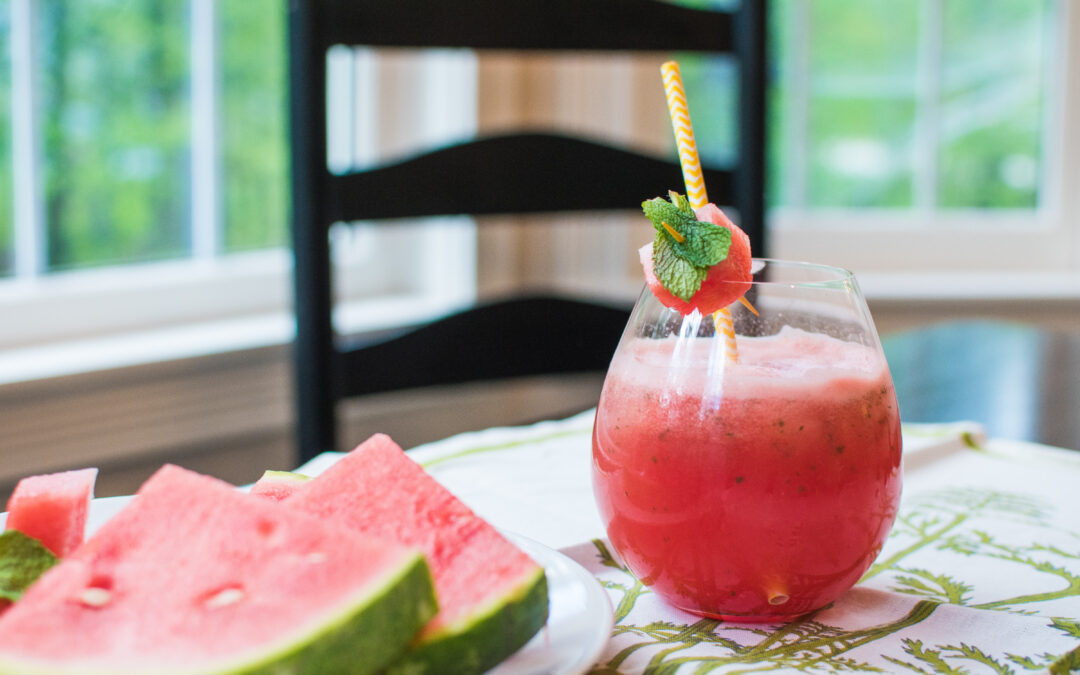
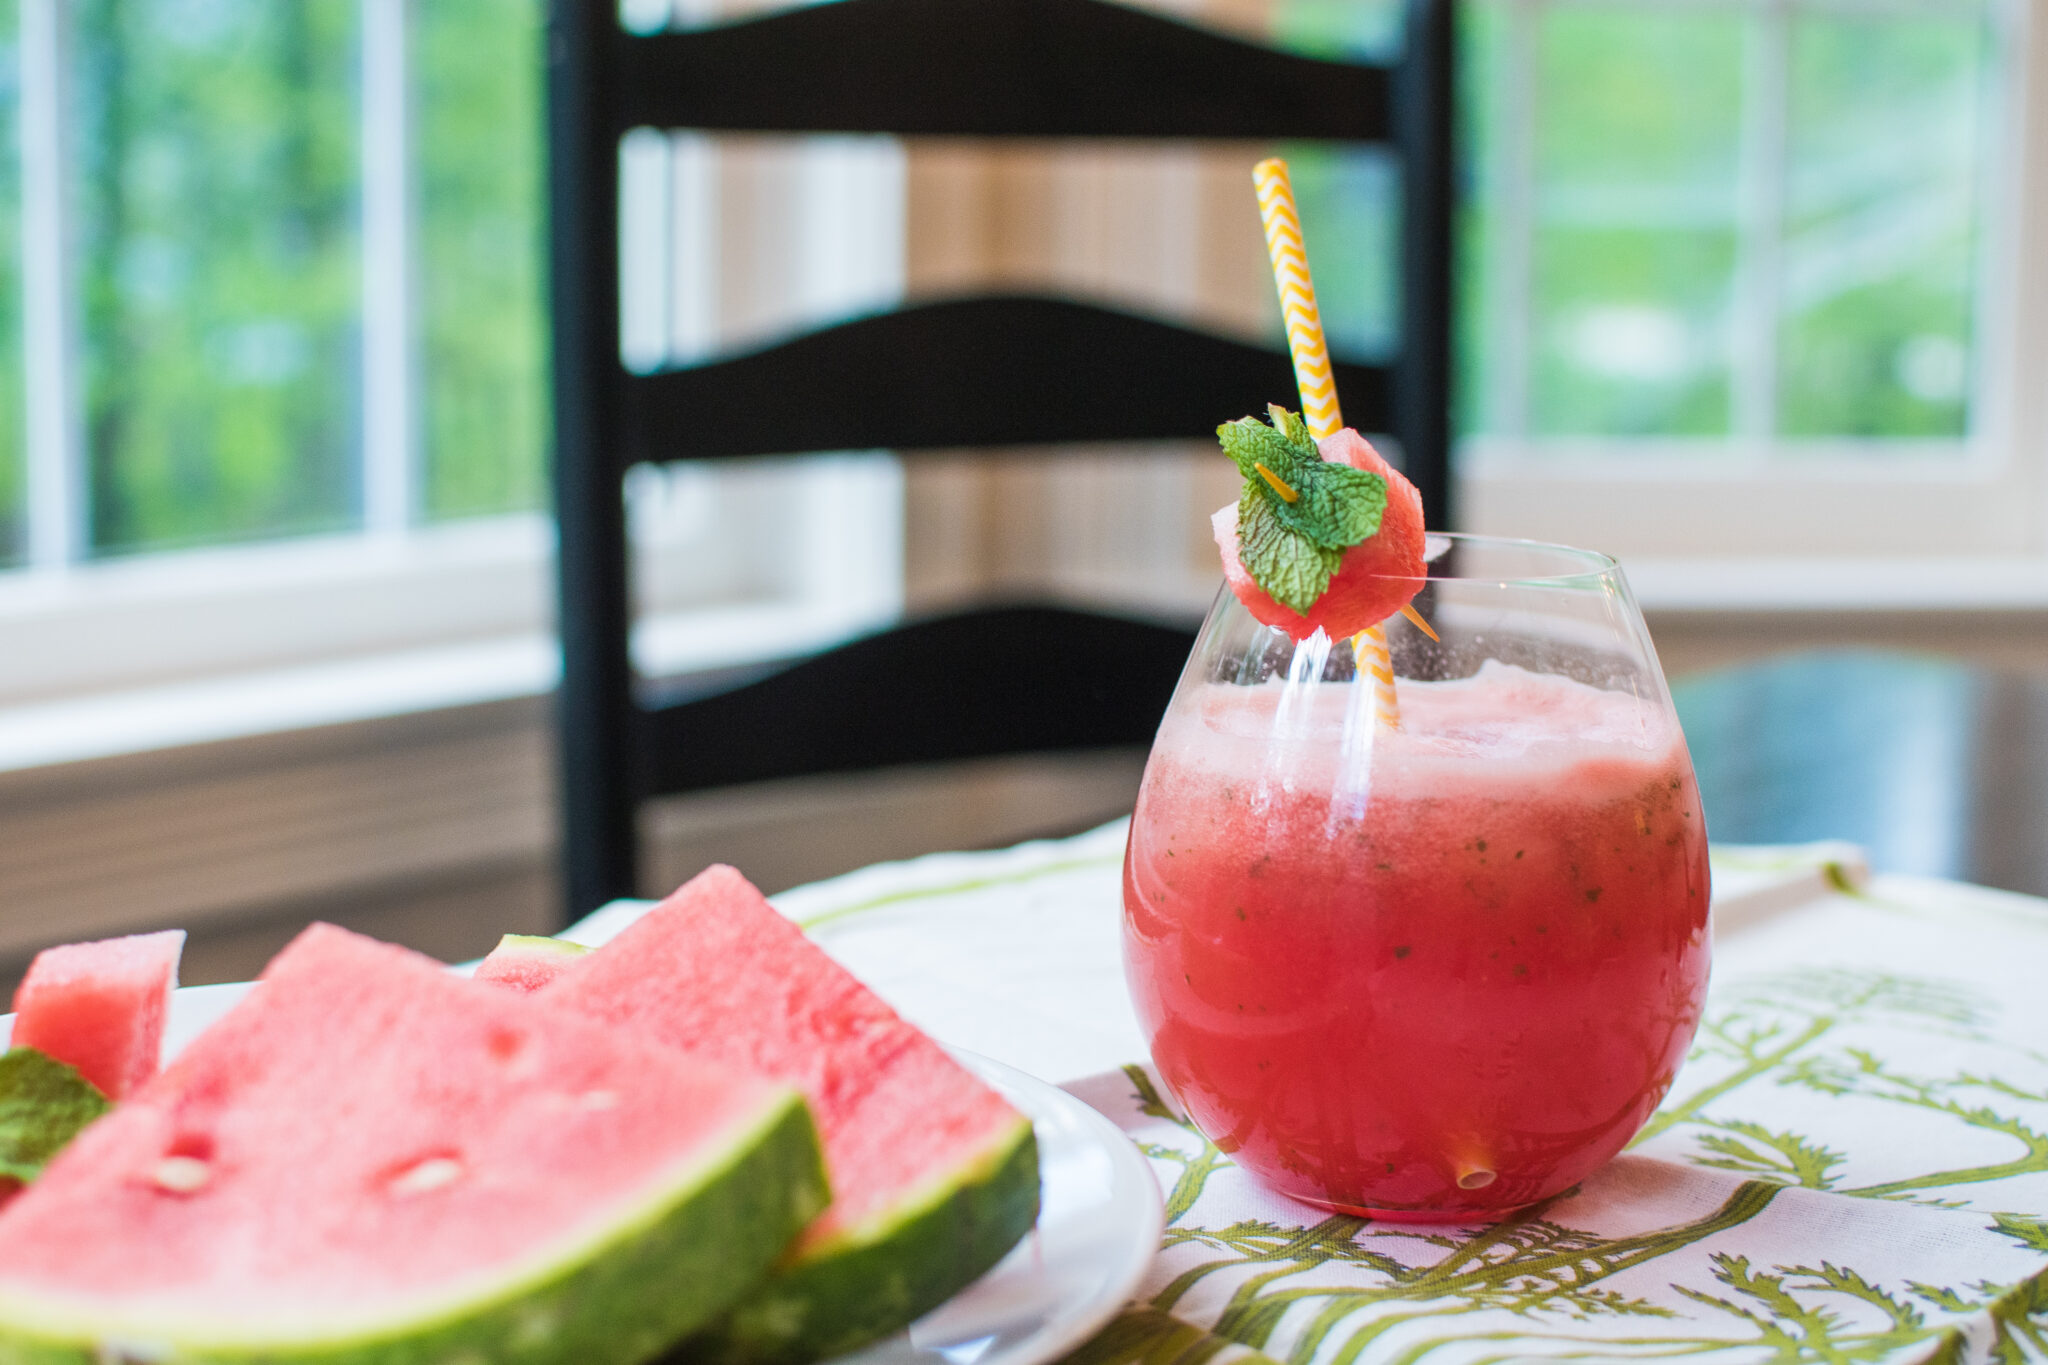
Moscow mules are a staple for our holiday parties, because they’re easy, enjoyed by everyone, and they are always a party hit. Whether you’re throwing a quick little dinner party, or make a big batch for a crowd, here’s how to make a smash at your next gathering! Plus, no fuss hosting tips to make your drink serving a breeze. Let’s go!
Stress Free Tips For Serving Your Holiday Mules
– Garnish glasses before guests arrive
– Set up an easy refill station
– Get creative, display garnishes in ways that serve as decor
Make The Most Of Self Serve Stations
The best gatherings are spent socializing and enjoying each other’s company. You can balance being a good host but enjoying the party as well by creating beautiful self serve stations. They’re fun instead of lazy. Get creative by using misc. items that tie in with your decor, such as teacups and those antiques you have stashed away. Monogrammed pieces from the past make the perfect addition to hold those neatly sliced garnishes.
Mint – 2 Sprigs, 4 if you’re a mint fiend like me.
1/2 Watermelon (medium sized)
Bubbly Strawberry Flavored Water.
Vodka – 1 to 2 Oz per glass.
Substitutions
Sometimes you don’t quite have all of the ingredients for a recipe or drink mix. Luckily, you can make quite a few adjustments for this drink.
Mint- If you don’t have a mint plant, you should reconsider that. They’re hardy and easy to keep. If you don’t, you can swap out basil for a more upscale-city flavor.
Watermelon- The refreshing crisp flavor of this drink changes if you swap out the fruit, but you can try strawberries & cucumber together, or honeydew and extra soda. The watermelon is heavy in water content so make sure to adjust the soda or add additional water-heavy fruit if you make the swap.
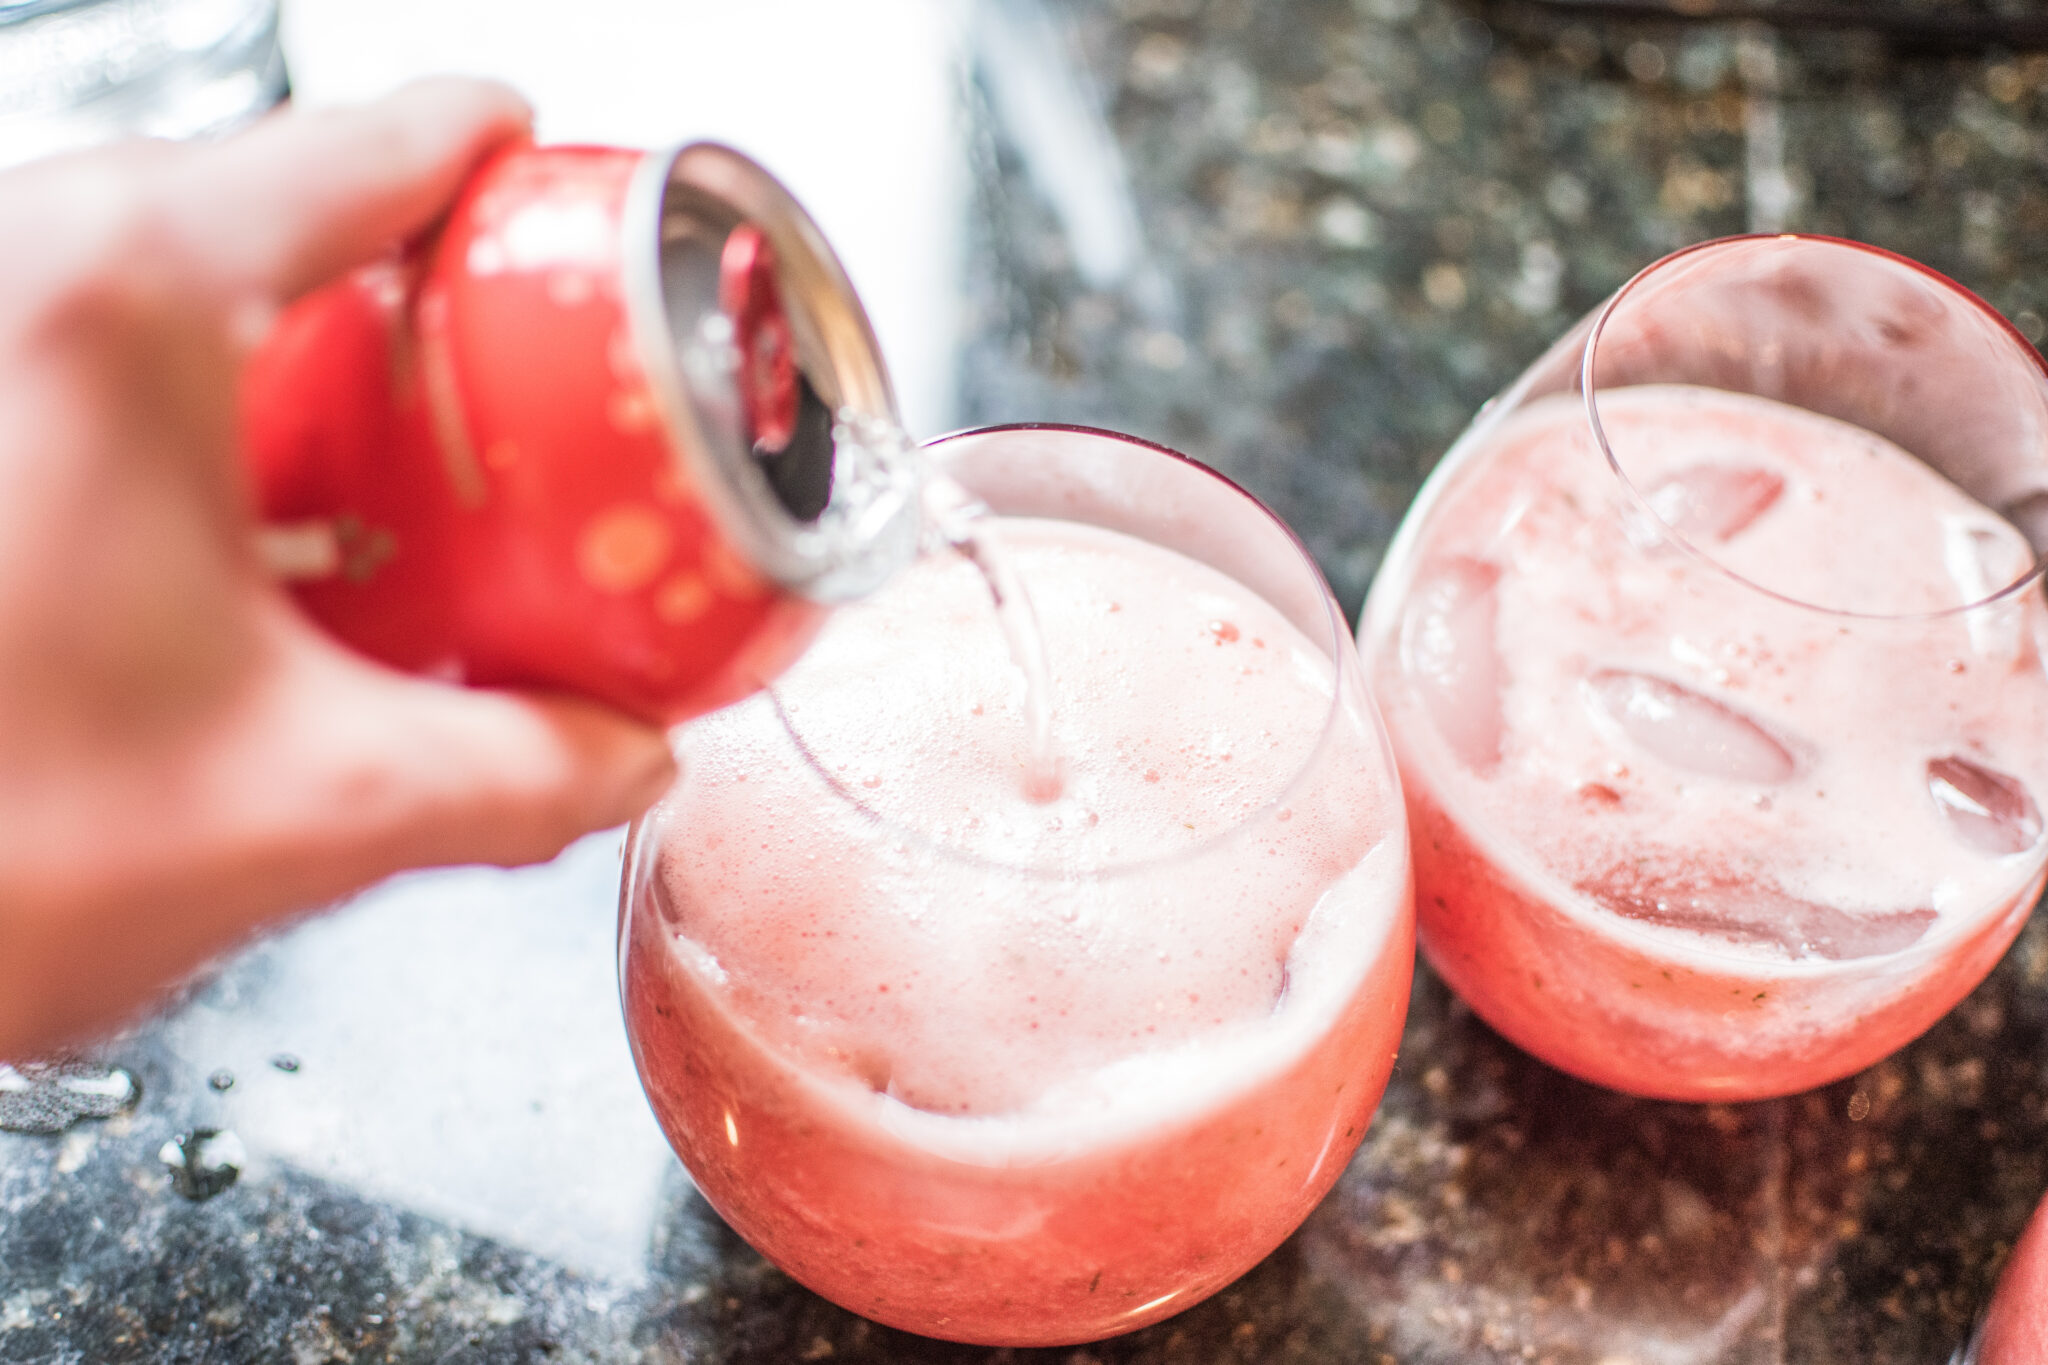
Bubbly Strawberry Flavored Water- Honestly you can swap out any flavor. If you have ginger beer, make yourself a watermelon Moscow Mule. If you have sprite, add a bit of water to tone down the sweetness.
Vodka- It’s alcohol. Easy… pick your flavor. Rum, gin, white wine, tequila.Does it really matter?
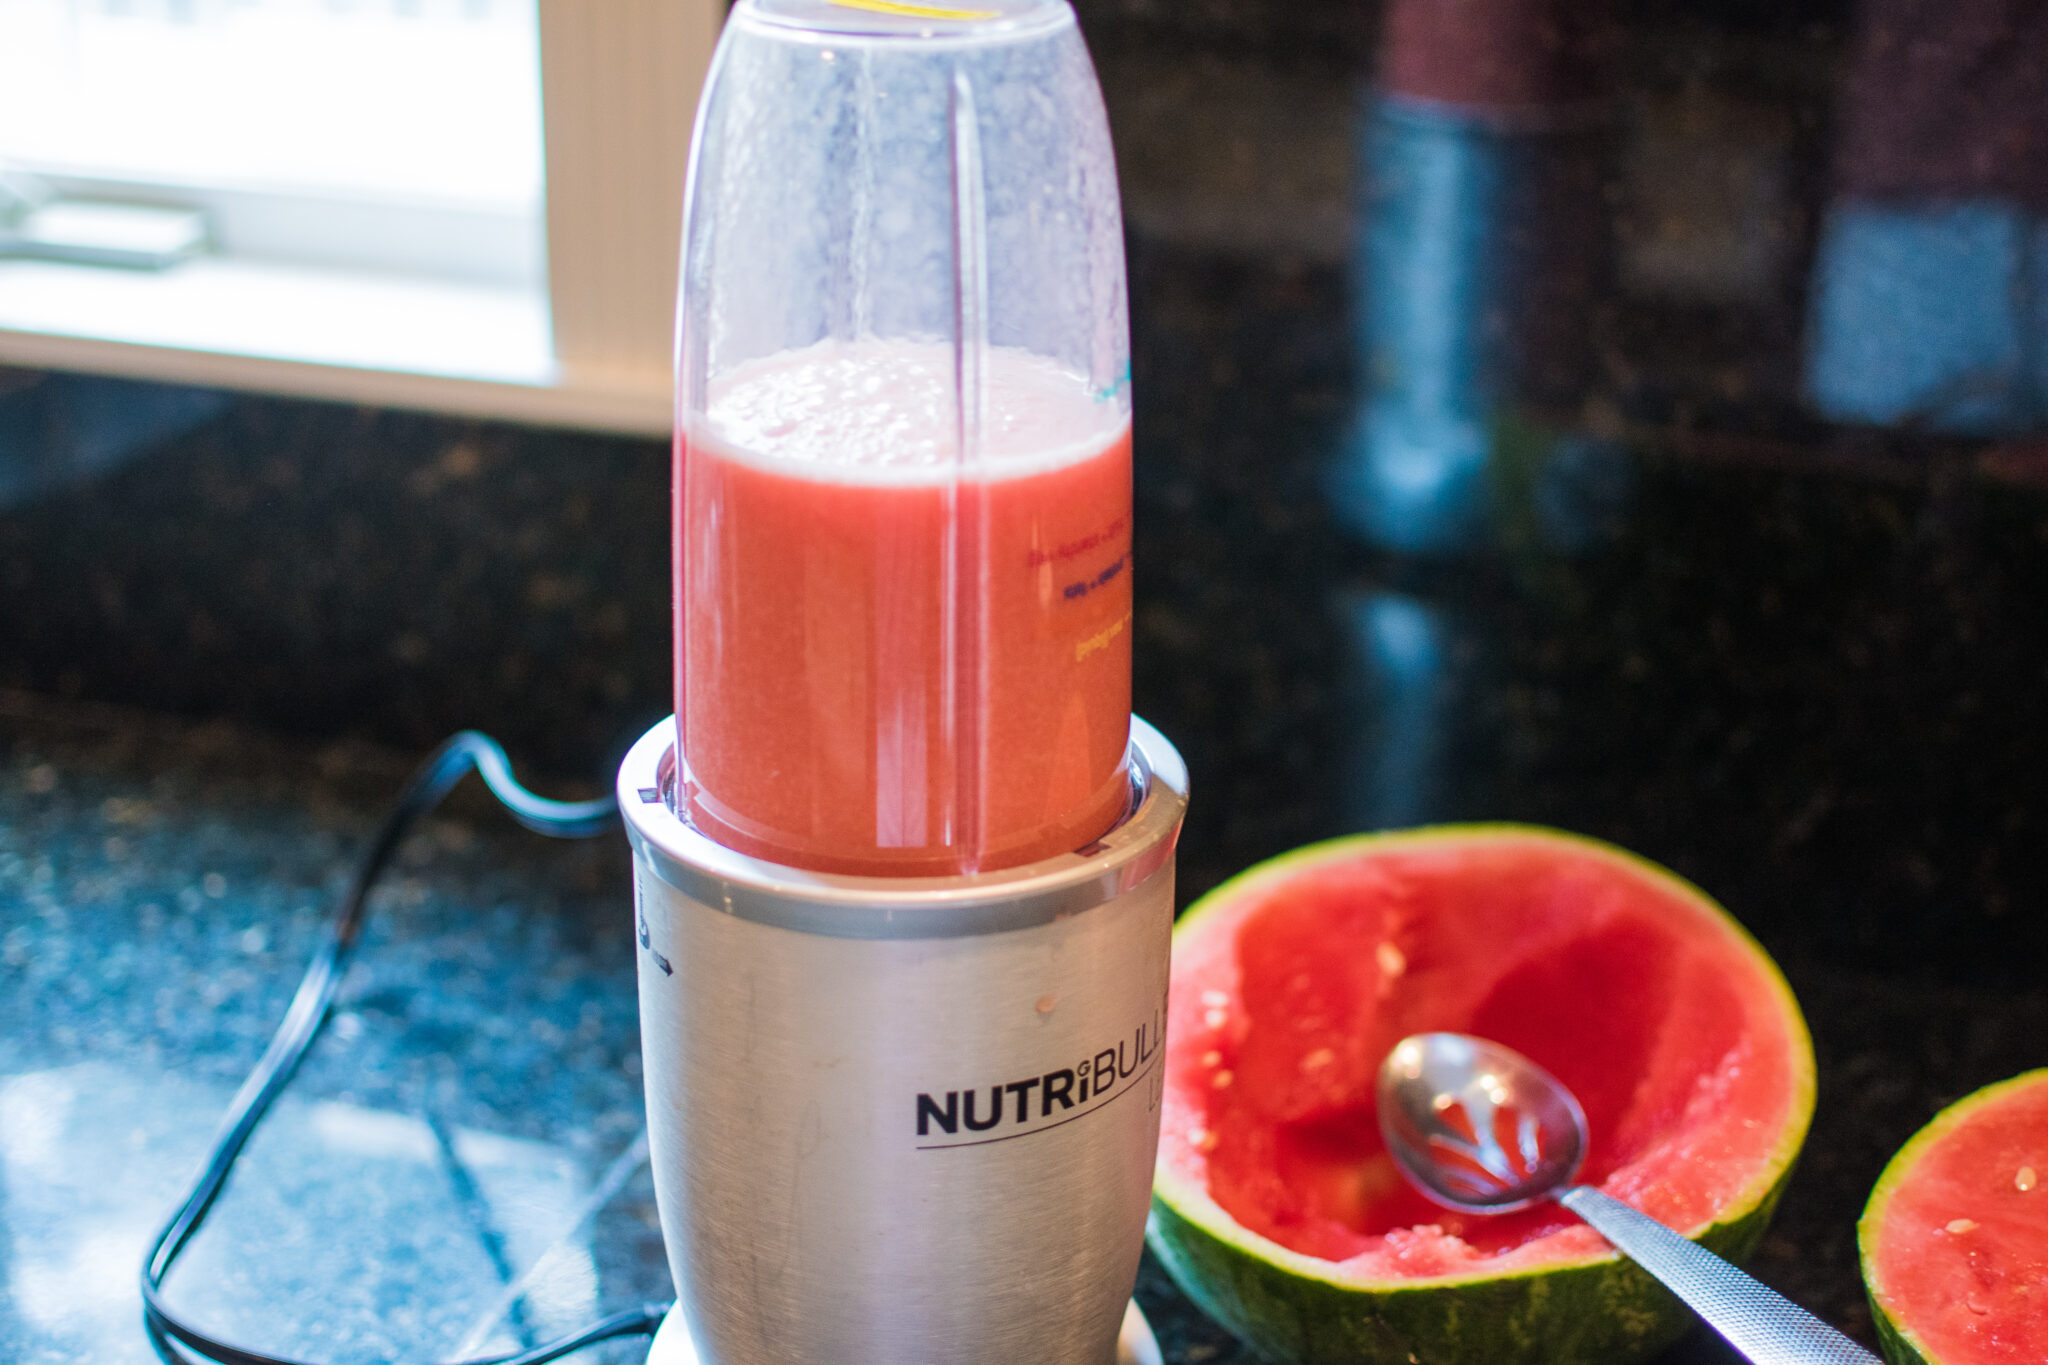
Step 1
Scoop out and blend your watermelon. I used my Ninja, use whatever blender or food processor you have. Add 3/4 of your mint and blend in too. Save the remaining mint for garnishes.
Step 2
This is a per- glass drink mix. Keep your blended watermelon stored in the refrigerator, covered, until you need it. Add 1-2 Oz of vodka per glass, over ice. Top vodka with approx. 1/4 cup watermelon mix. (We have huge glasses so just use your noggin and change it around if your cups are smaller)
Step 3
Top with flavored water. This is a very light, refreshing drink.
Not too sweet, but just a touch of bite from the watermelon. I mixed in
strawberry flavored water for a twist with the mint.
Oh yeah. Garnish.
Throw on a cube or two of watermelon and mint. Make it pretty.
Wham Bam Thank You Ma’am
I love this drink. It’s mindlessly easy and a great way to impress when you have guests over.
After all- that’s the whole point. Easy things that make us look really cool but it was just.. easy. Ha. Oh, and it tastes
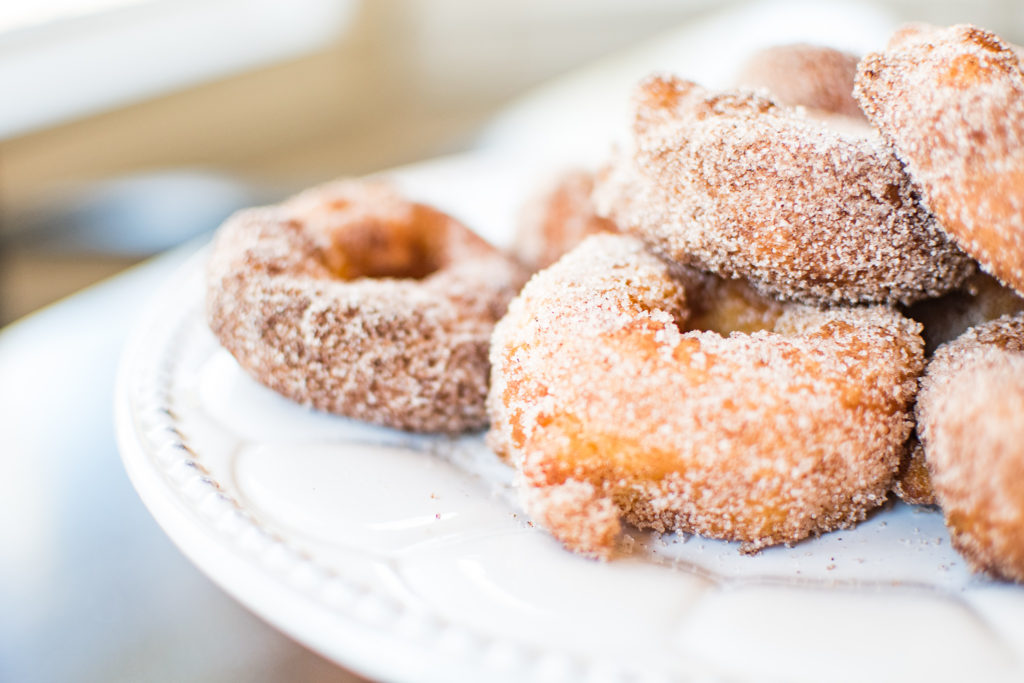
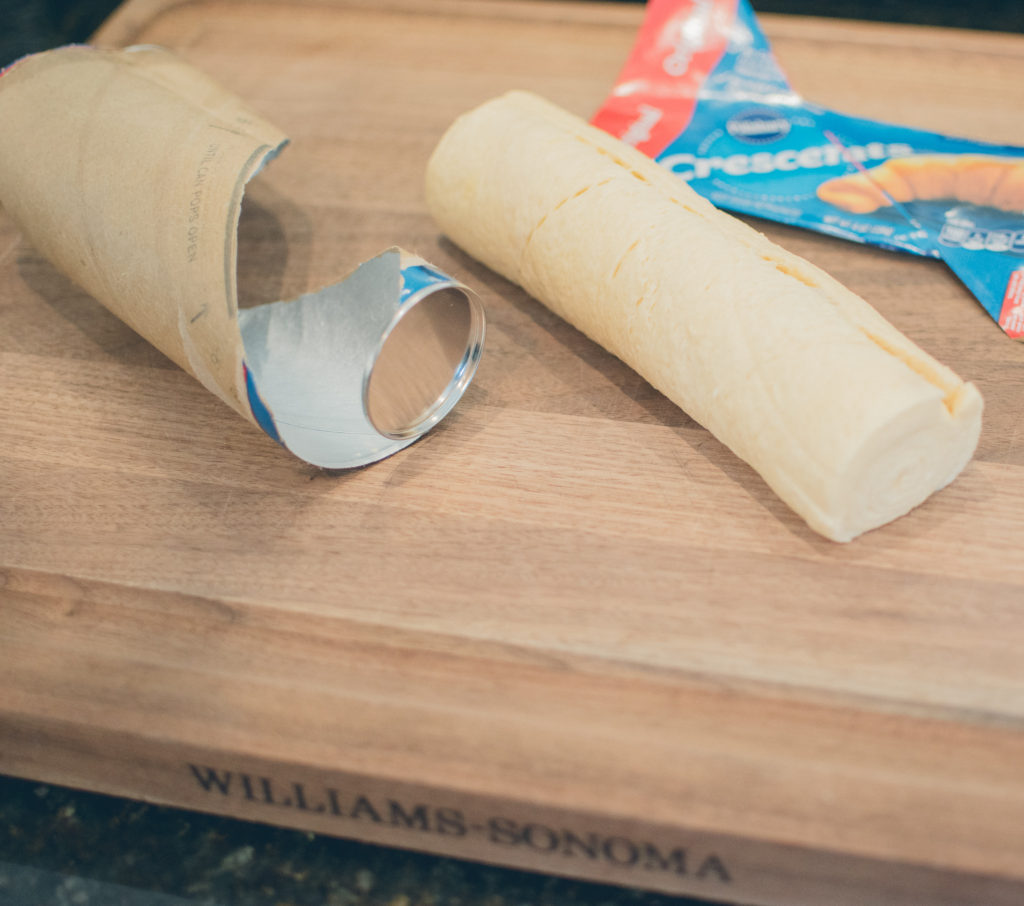
I get into these kicks, when I really love something and just keep making it. Lately, that’s donuts. Sure I can make my favorite recipe that takes over a day to prepare… but I prefer the quick and easy route. Enter, 15 minute donuts using Pillsbury Crescent dough! You know those little blue tubes with the dough boy on front? Fry those up and they make delicious donuts. Especially when you cover them in cinnamon sugar. Here’s how to do it.
Make Your Donuts
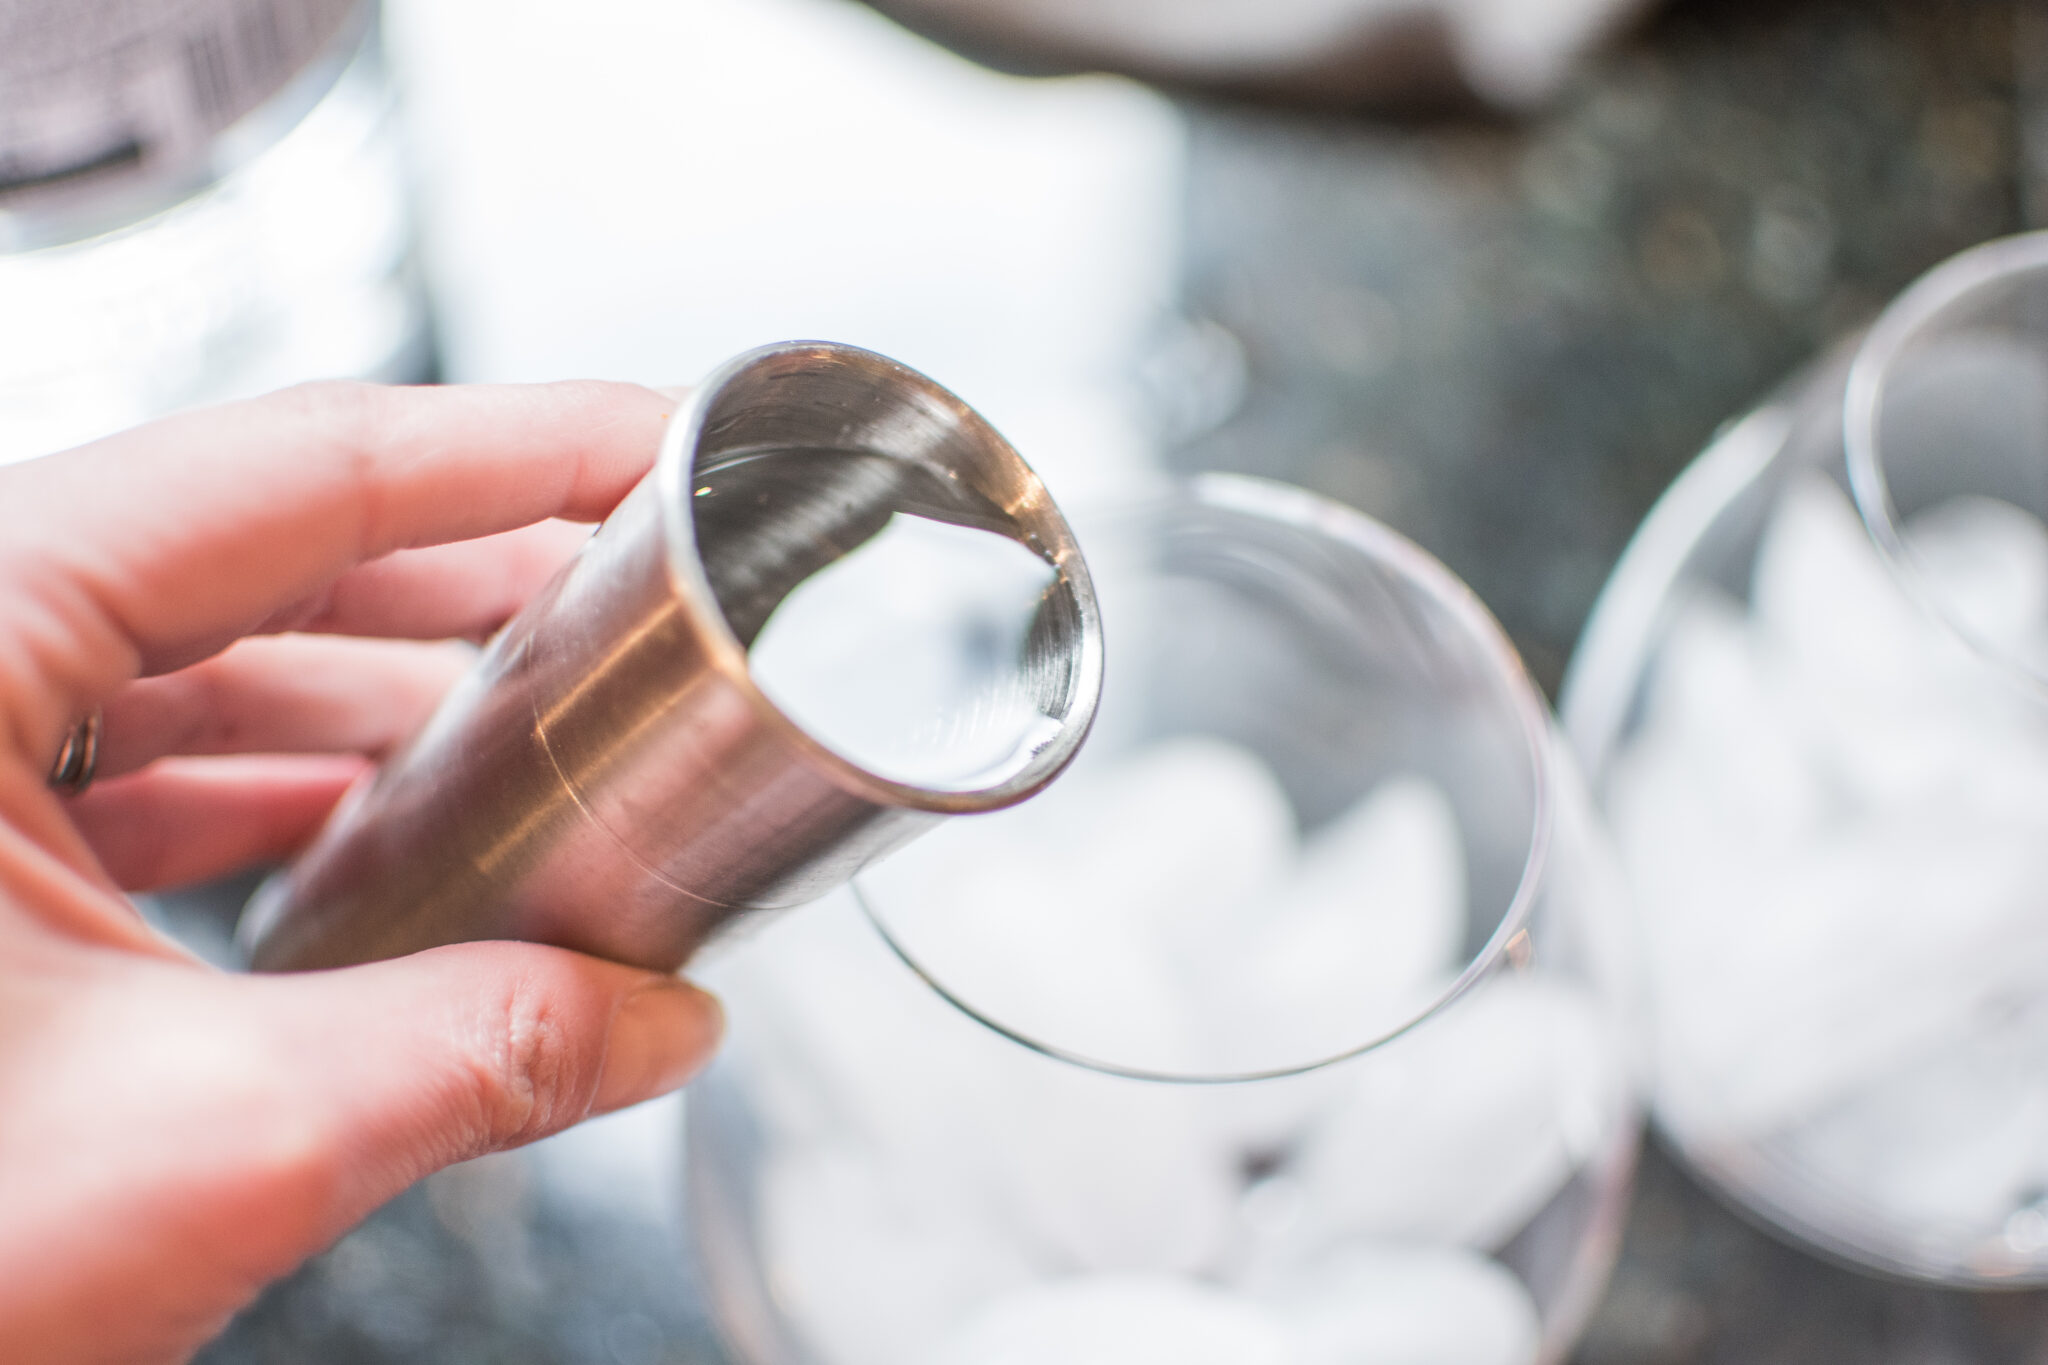
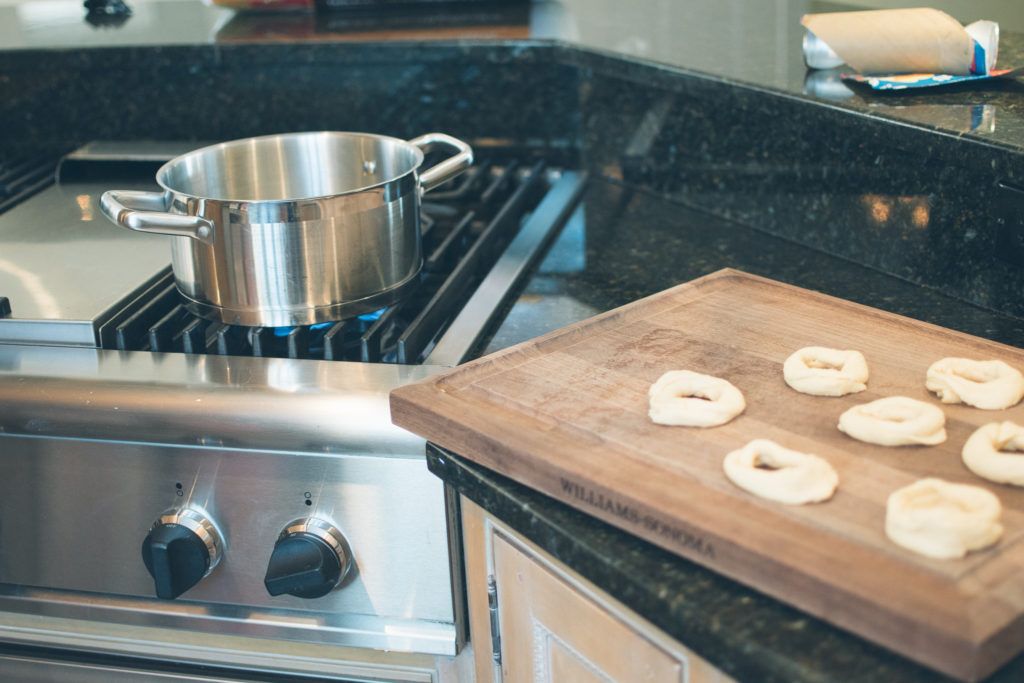
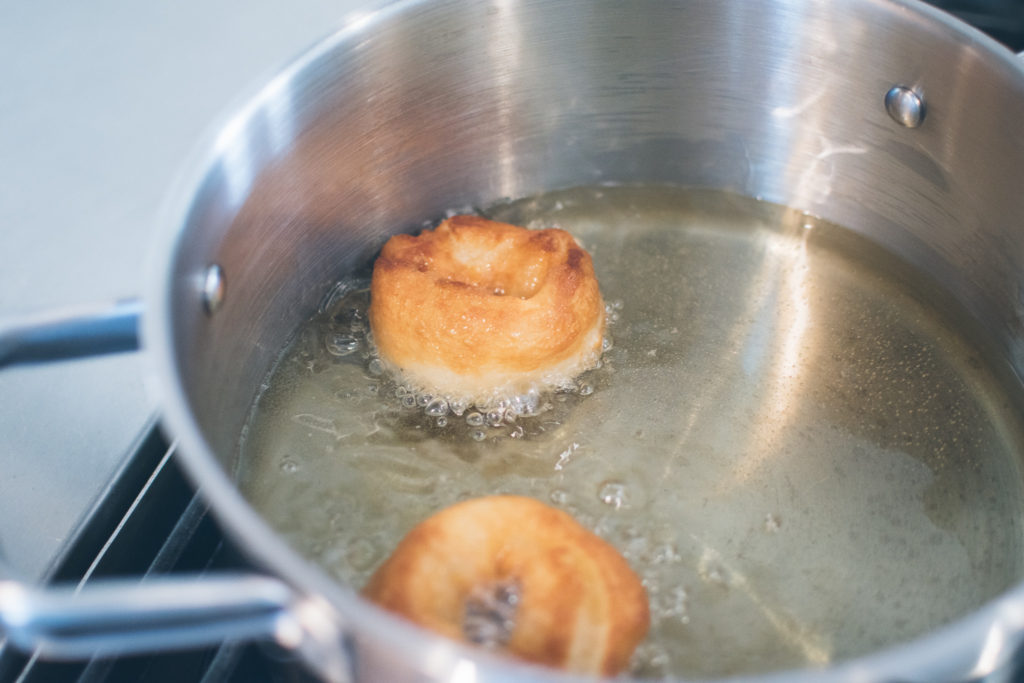
Some people roll the dough out and use a cookie cutter to make the donuts… but that’s a waste of time. Instead, just tear off the pre-cut sections, pull and shape them into 9 donuts (depending on the size of your crescent can). Told you this was easy. Then, heat your oil in a tall pan to medium-high heat. Your oil should be at least two inches deep, so add more oil to your pan if necessary. The tall pan will give you a little protection from oil splash, and help keep your kitchen clean too. (I hate oil splatter cleanup) You’ll know the oil is ready if you drop some water inside and it splatters back.
In a small bowl, mix together your cinnamon and sugar and set aside. Set a plate aside with paper towels to rest freshly cooked donuts as well. Have something ready to pull the donuts out of the hot oil, like a chopstick or skewer. Drop your donuts in two or three at a time, overcrowding the pan cool the oil down too much and you’ll have soggy donuts.
Cook for 1-2 minutes until the donuts turn golden brown, then flip them to cook the other side. Just look how delicious they look! Remove them from the oil quickly and set aside on a plate with paper towels to soak up excess oil.
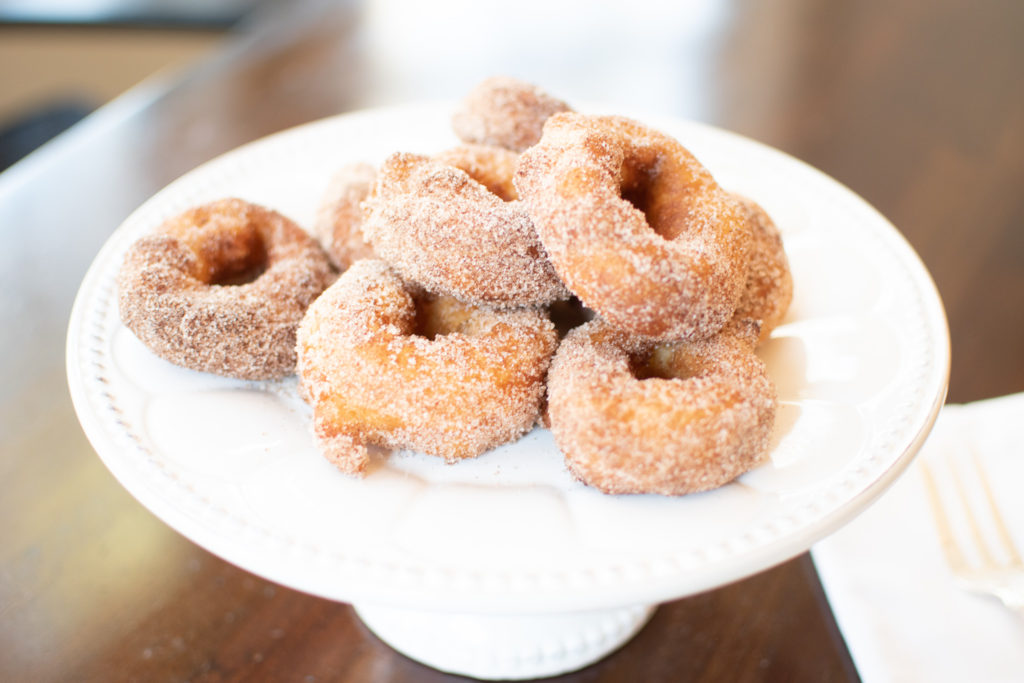
Let your donuts rest about a minute before coating them in your cinnamon-sugar mixture. All in all, the whole recipe takes no longer than 15 minutes! Serve these delicious little donuts right away, they don’t keep for more than a day. Also, check the temp before feeding to littles in case hot oil is trapped inside!